I love holidays and decorating for holidays; be that as it may, I am to much of a procrastinator to actually get decorations up before the holiday gets here. Unless it's Christmas, since I normally decorate for that around Thanksgiving. My plans for the 4th of July this year were big - for every decoration I was making for myself I was going to make another one to sell. Hmmm well since the fourth is only six days away I would say I'm not doing very good. I did get one project complete and I started another one yesterday
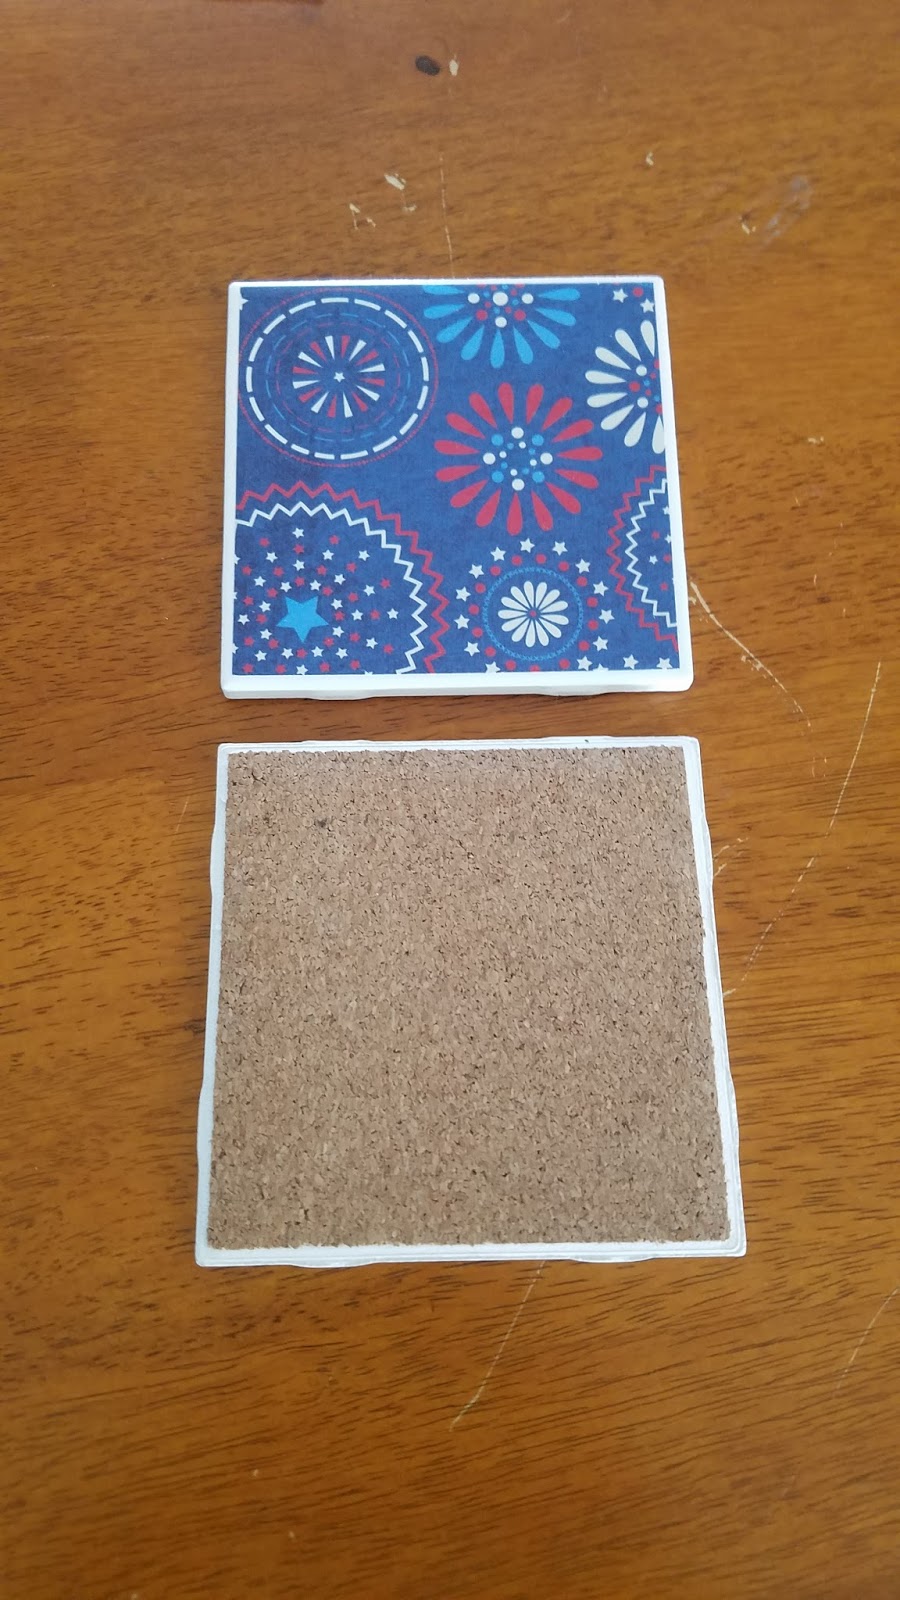
My complete project is my holiday coasters. I made these last year for Valentine's Day and St. Patrick's Day; last years coasters were not good quality at all so I tried something different this year and I like them a lot more.
Materials:
Materials:
- Plain white kitchen/bathroom tiles. I got mine at home depot because of the military discount. There are like fifty cents a piece
- Mod Podge (Glossy or Matte)
- Something to smooth the Mod Podge with (old credit cards work great, pampered chef scrapers work, or a store bought Mod Podge rubber)
- A roll of adhesive cork
- Outdoor quality clear acrylic coating
- Scrapbook paper for the design of the coaster
- Optional - A cricut Explore Air. I didn't have this last year when I made these and it made a big difference; however, it can be done without a cutting machine.

Step 1: Turn on some music or a movie (I put on Finding Dory, just because its awesome) I'm lucky enough to have a TV and xbox with Netflix in my craft room.
Step 2: Measure your tile - mine was 4x4
Step 2: Measure your tile - mine was 4x4
Step 3: Cut your scrapbook paper to the size of your tile. I did a little bit smaller because I wanted a white border around my coaster.

Step 4: Place your paper on your tile, you have time to arrange it where you want it. Moving it to much though could cause your paper to rip.
Step 5: Ask your husband to make you dinner because you are way to into this project to take a break and cook.
Step 6: Time for the big 'what not to do' section. Don't Mod Podge over the paper. I did this last year and it left a streaky and sticky look to them that I didn't like. So this year I used the rubber scraper to smooth out the paper gently, then I sprayed it with the clear coating.
Step 7: Let the coating dry for a good two hours and then spray it again.
Step 8: While the coating is drying go cut the cork. I cut this to the same size as my paper because I didn't want any cork hanging out from under the bottom and looking tacky. My cricut air is able to cut my work this was an easy process for me. You can just cut the cork with scissors also, just use a ruler and trace your lines. If you are using a cricut you may need to tape the cork to the mat.
Step 8: Once the coasters are dry and your cork is cut you attach them all together. Peel the back off the cork and push it onto the back of the tile. Make sure you push it down everywhere so it sticks really good. -Last year for the back cork I used a precut cork coaster. Disadvantages: to thick and couldn't get it glued properly. Advantage: it was pre-cut
 Step 9: Let your puppy help you whenever she wants to.
 Step 10: Nap time for the pups.


Advice #1 - Be careful with your Mod Podge. Even though it is clear it will show up if you get it on parts you don't want it. I got some on the top of some of my scrapbook paper and it has a different texture there.
Advice #2 - Don't use pre-cut cork coaster, get the adhesive roll and cut it to your desired size. I found mine at Hobby Lobby.
Advice #3 - Make them at least two weeks before the holiday you are celebrating, otherwise you won't get enough time to enjoy them.
Comments
Post a Comment